There’s something undeniably nostalgic about biting into a vibrant,chewy fruit roll-up-teh perfect blend of sweet tanginess and playful texture that instantly transports you back to childhood afternoons. But what if you could recreate that magic at home, with wholesome ingredients and no mysterious additives? Welcome to the world of homemade fruit roll-ups, where simplicity meets sweetness in the most delightful way.In this guide, we’ll explore how to craft your own fruity delights from scratch, turning fresh fruit into colorful, tasty treats that are as fun to make as they are to eat. Get ready to roll up your sleeves and unwrap the secrets to naturally flavorful, homemade fruit roll-ups!
Choosing the Best Fruits for Vibrant and Flavorful Roll-Ups
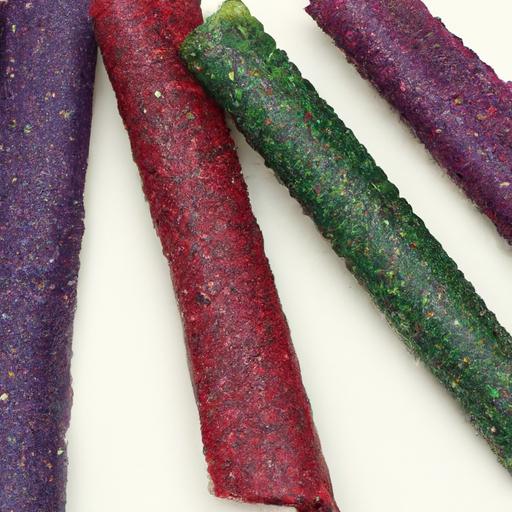
Sweet & Simple: How to Make Homemade Fruit Roll-Ups begins with selecting the freshest, ripest fruits to achieve that irresistible blend of vibrant colour and bold flavor. Fruits like strawberries, mangoes, raspberries, and peaches work wonderfully because they’re naturally sweet and offer a stunning spectrum of reds, oranges, and yellows. Tart options such as green apples or cranberries can add a delightful zing, while blueberries and blackberries lend a deep, rich hue and bursts of sweetness. when choosing your fruit, opt for varieties that are fully ripe but not overly soft to ensure the puree turns out smooth yet thick enough to roll easily. freshness is key-seasonal fruits often bring the best intensity of flavor, making each bite a vivid experience.
Mastering the Perfect Puree Texture for Easy Rolling
Creating the perfect puree texture is an art that transforms your selected fruits into silky smooth, easily spreadable roll-ups.Start by washing and pitting as needed, then gently simmer chunks of fruit with a splash of water to break them down. Avoid adding too much liquid-about 1/4 cup per 2 cups of fruit-to keep your puree thick. Blend the cooked fruit until entirely smooth using a high-powered blender or food processor. To achieve the ideal consistency, strain the puree through a fine mesh sieve to remove any seeds or fibrous bits, resulting in a luscious texture that won’t crack or stick during drying.The goal is a spreadable, jam-like thickness that peels away effortlessly for extraordinary homemade fruit roll-ups.
Crafting Natural Sweeteners and Flavor Boosters
For a sweet, natural boost, incorporate ingredients like honey, maple syrup, or agave nectar sparingly as you blend-these subtle sweeteners highlight the fruit’s innate sugars without overpowering thier natural taste. A splash of fresh lemon juice brightens and balances the sweetness, adding that perfect zing. Spices such as cinnamon, vanilla extract, or a pinch of ginger can elevate the flavor profile further, turning simple fruit roll-ups into delightful gourmet treats. For those seeking a hint of tartness, consider adding a few fresh mint leaves or a dash of lime zest into the puree before blending.
Tips for Storing and Enjoying Your Homemade Fruit Roll-Ups
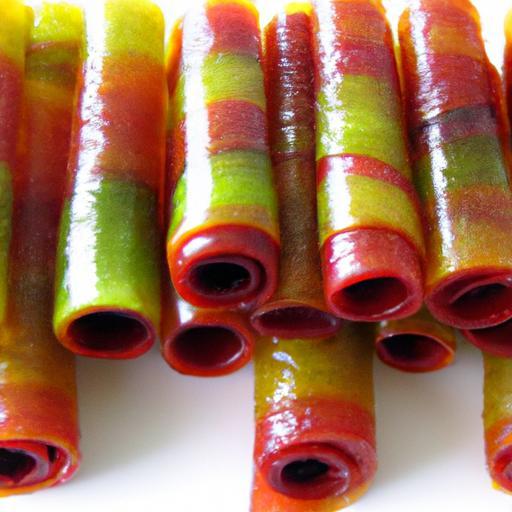
Once dried and cooled, wrap your roll-ups tightly in parchment paper or plastic wrap to keep them soft and pliable.Store them in an airtight container or resealable bag at room temperature or in the fridge for longer freshness. Properly stored, these fruit roll-ups last up to two weeks, making them a perfect grab-and-go snack or lunchbox treat.To bring out their best, serve your roll-ups slightly chilled or at room temperature with a sprinkle of finely chopped nuts or a side of yogurt for dipping. Visual appeal amplifies the experience-roll colorful strips into spirals or cut fun shapes with small cookie cutters to delight kids and adults alike. Homemade is always tastier, healthier, and bursting with love in every bite.

Q&A
Q&A: Sweet & Simple – How to Make Homemade Fruit Roll-Ups
Q1: What makes homemade fruit roll-ups better than store-bought ones?
A: Homemade fruit roll-ups are pure, natural, and customizable! Unlike many store-bought versions loaded with added sugars, artificial flavors, and preservatives, homemade rolls let you control the ingredients. Plus, they’re fresher, bursting with real fruit flavor, and a fun DIY project.Q2: What fruits work best for homemade fruit roll-ups?
A: Almost any fruit can be transformed into a roll-up! Berries like strawberries, raspberries, and blueberries are popular for their vibrant color and tangy taste. Mango, peaches, apples, and even kiwi bring gorgeous hues and natural sweetness. Just make sure the fruit is ripe and juicy for the best results.
Q3: Do I need any special equipment to make these?
A: Not at all! A blender or food processor, a baking sheet lined with parchment paper, and an oven or food dehydrator are all you need. For a creative twist,silicone mats work great too. No fancy gadgets, just simple tools you likely have in your kitchen.
Q4: How do I get that perfect chewy yet pliable texture?
A: It’s all in the slow drying! After pureeing your fruit, spread it thin and even on parchment, then bake it at a low temperature (around 140°F or 60°C) for several hours. Check periodically until it feels pliable but not sticky. The goal is a leathery consistency that peels away cleanly.
Q5: Can I add sweeteners or spices?
A: Absolutely! While many fruits are naturally sweet, a touch of honey, maple syrup, or agave can add depth. Spices like cinnamon, ginger, or vanilla extract can elevate the flavor profile. Just blend them in with the fruit puree before drying.
Q6: How should homemade fruit roll-ups be stored?
A: Keep them in an airtight container at room temperature,away from direct sunlight. They typically last for about a week or two. For longer storage, refrigerate or even freeze them – they thaw quickly and retain their chewiness.Q7: Are homemade fruit roll-ups healthy?
A: Yes! As they’re made from 100% fruit (plus optional natural add-ins), they’re packed with vitamins, antioxidants, and fiber. And as you control the sugar, they’re a wholesome snack alternative-perfect for kids and adults craving something sweet without the guilt.
Q8: any tips to make the process fun for kids?
A: Definitely! Let kids pick their favorite fruits, help puree the fruit, and spread the mixture on the baking sheet.Rolling up the finished fruit leather is a joyful moment-like unwrapping a tasty treasure. You can even cut roll-ups into fun shapes with cookie cutters for a creative touch.
Making homemade fruit roll-ups is a delicious blend of science, art, and nostalgia. With just a bit of patience and creativity, you’ll have sweet, simple snacks that brighten any day!
Insights and Conclusions
There you have it-a sweet, simple way to transform fresh fruit into a colorful, chewy treat that’s as fun to make as it is to eat. Homemade fruit roll-ups not only let you control the ingredients but also add a personal touch to a beloved childhood snack. Whether you’re crafting these fruity ribbons for a lunchbox surprise, an after-school nibble, or a weekend project with the kids, the process is delightfully straightforward and endlessly customizable. So next time the craving strikes, skip the store-bought versions and roll up your sleeves-your taste buds (and your family) will thank you!